
Creating a campaign
- What you get:
- an active campaign with a voice, language, first message and call schedule.
- Before you start:
- nothing. You can add a SIP account later.
1. Campaign type
“Campaigns Dashboard” → “+ New Campaign” → “Voice Agent”. This type holds a live conversation; RoboCall only plays a script. The type can't be changed after creation.
2. Quick start wizard
In three steps the wizard drafts the agent instructions. What each step looks like is shown in the “Quick start” guide, steps 3–6.
Niche
It is used to pick the examples in the instructions: e-commerce, real estate, automotive, healthcare, beauty & wellness, education, B2B SaaS & IT, finance & insurance, travel & hotels, logistics & delivery, construction & repair, HoReCa, home services, retail, other. You can skip this step.
Scenario
- AI Builder — describe the agent's task in your own words and click “Generate blocks”: the AI writes all the instruction blocks. The more detailed the description, the better the agent understands the purpose of the call; there is an example in the hint.
- Ready scenario — a template with ready logic that AI Builder adapts to your niche: “Lead qualification”, “Customer reactivation”, “Demo booking”, “Order confirmation”, “Quality survey”, “Receptionist”, “Payment reminder”, “Multilingual support”.
- “Bot from scratch” — no generation: you write the instructions yourself.
Company data
Both fields are optional, but fill in at least one — then the agent will speak facts.
| Field | Description |
|---|---|
| “Company website” | “Scan” checks the address, and during generation the AI reads several pages of the site: services, terms, regions. |
| “Describe the company in your own words” | Free text; the AI sorts it into the instruction blocks. |
Documents and FAQs don't go here — see the “Knowledge base (RAG)” guide for them. Click “Create bot”: the campaign editor usually opens within a minute.
3. Basic settings
The left column of the editor, the “Basic settings” block.
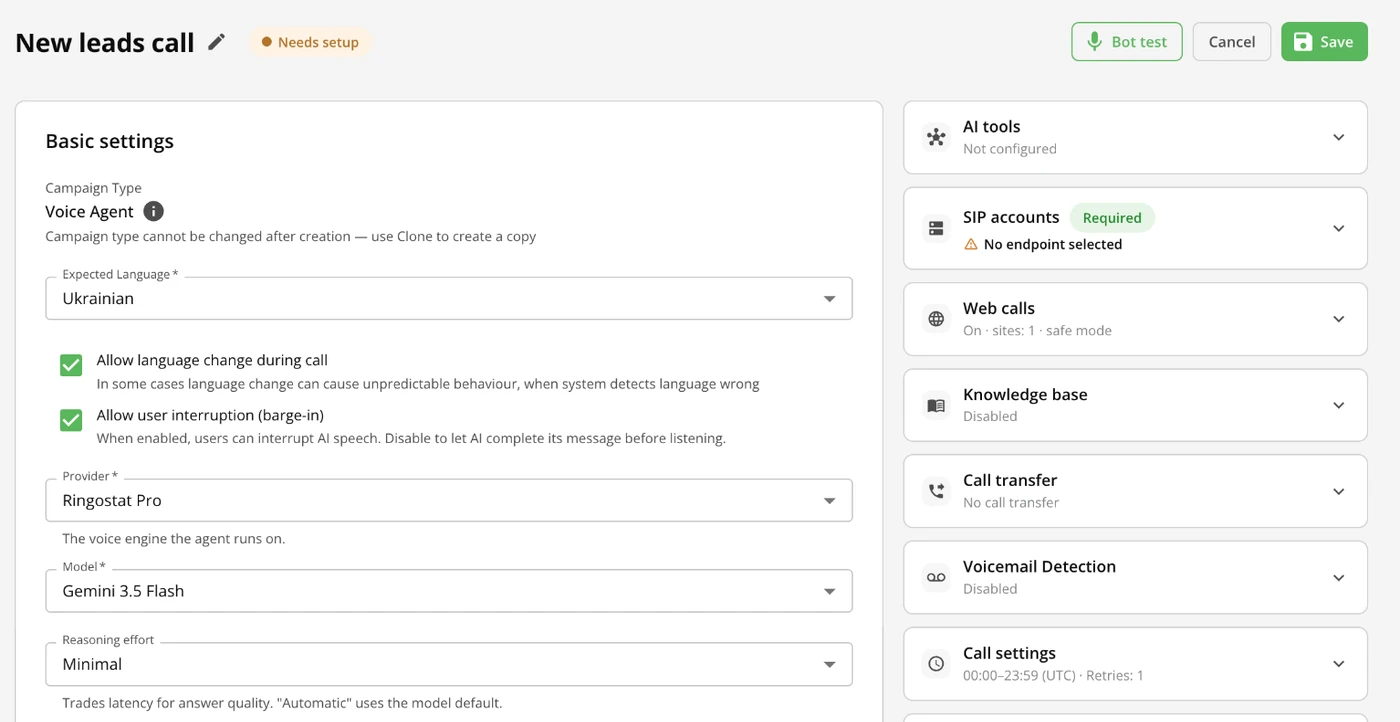
| Field | Status | Description |
|---|---|---|
| “Campaign Name” | required | An internal name; the customer doesn't hear it. |
| “Expected Language” | required | The language the customer will speak. Turn on “Allow language change during call” if the conversation may switch languages. Off by default (on in the “Multilingual support” scenario). |
| “Allow user interruption (barge-in)” | — | On by default: the customer can interrupt the agent. Turn it off so the agent always finishes its lines. |
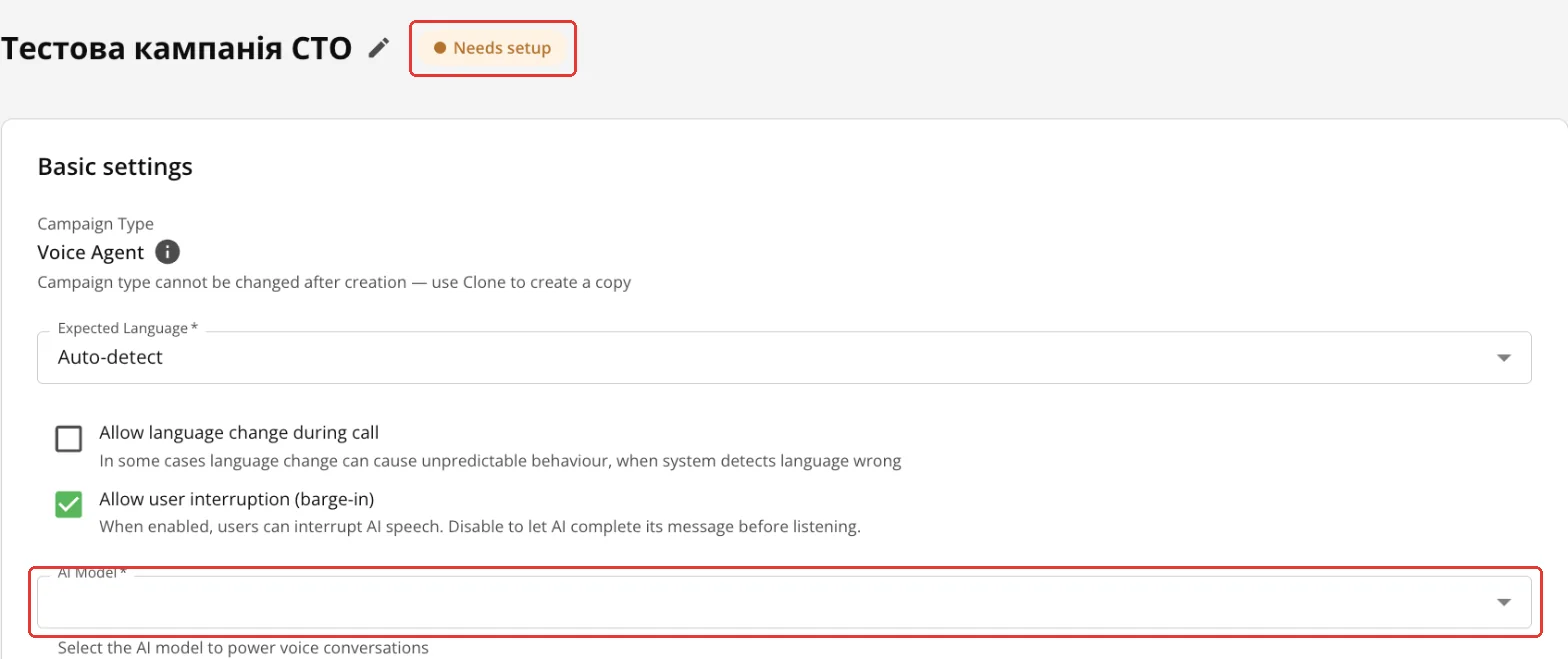
| “Provider” and “Model” | required | Pick the provider first, then the model that holds the conversation. Recommended: “Ringostat Pro” → “Gemini 3.5 Flash”. |
| “Reasoning effort” | — | Not every model has it. “Automatic” is the fastest level; a higher level makes answers more careful but pauses longer. |
| “AI Voice” | required | The ▶ button plays a sample before saving. For an external voice provider the field is called “Voice”. |
| “Pro Settings” | optional | How the agent reacts to the other person's pauses. For Ringostat Pro models — “Voice agent settings” (“Turn eagerness”, “Take turn after silence (s)”), for other models — “Speech Detection Delay” and “Silence Duration” (ms). |
To change the voice in an existing campaign: “Edit Campaign” → “AI Voice” → choose a voice → “Save”. The “Campaign saved” message appears. If the voice's gender changed, check the “Identity” block: the agent must describe itself to match the voice.

4. First message
The “First message” card, the “AI disclosure & compliance” section.
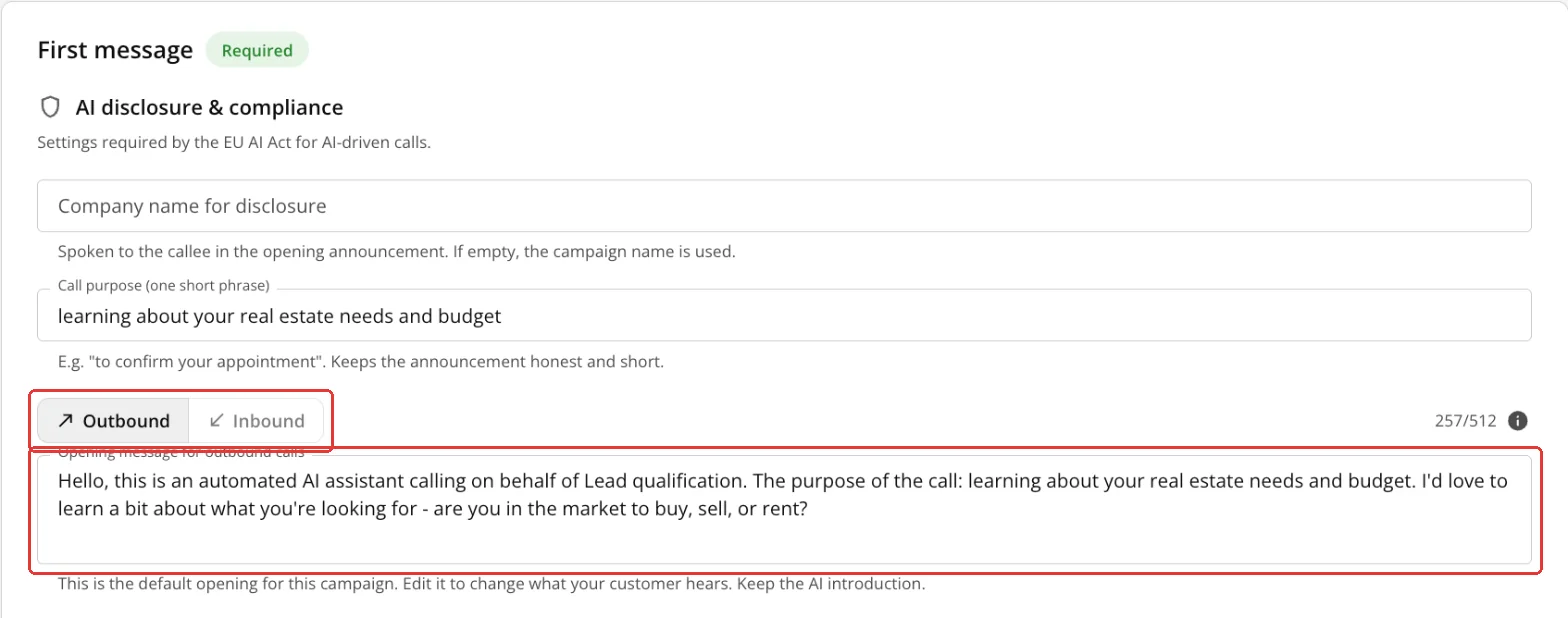
At the start of a call the agent always says that it is an AI. This is required by Article 50(1) of the EU AI Act, in force from 2 August 2026; the fine is up to €15 million or 3% of worldwide turnover.
| Field | Description |
|---|---|
| “Company name for disclosure” | Spoken in the opening. If the field is empty, the campaign name is spoken. |
| “Call purpose (one short phrase)” | For example: “to confirm your appointment”. Spoken in the opening of outbound calls. |
| “Opening message for outbound calls” / “… for inbound calls” | One field with an “Outbound / Inbound” switch; the default text is already filled in. Edit it to change what the customer hears. The text must contain “AI” or “artificial intelligence”; just “automated assistant” is not enough. |
The default outbound opening: “Hello, this is an automated AI assistant calling on behalf of {company name}. The purpose of the call: {purpose}.” Then the agent says the first message from the instructions. In inbound calls the purpose is not spoken.
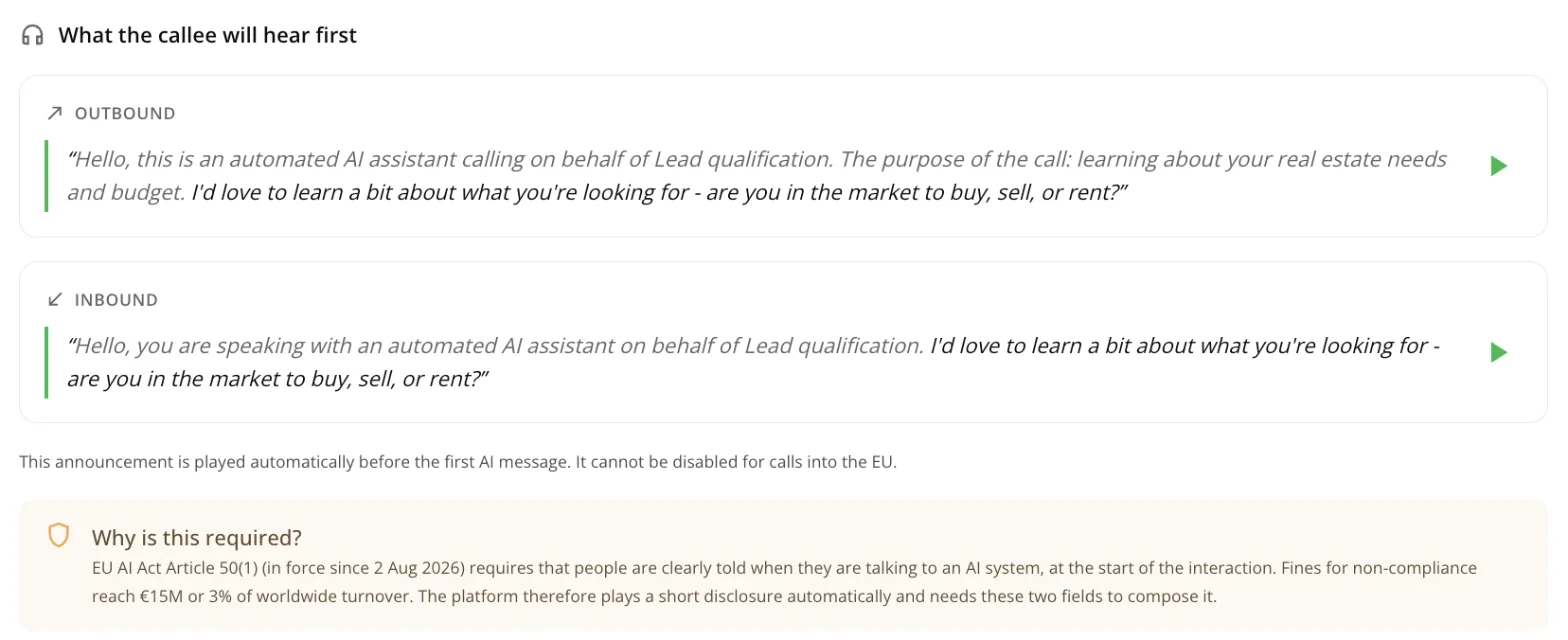
The “Exclude from EU AI Act disclosure” switch removes this message, but then the campaign calls only allowed countries, and other numbers are rejected.
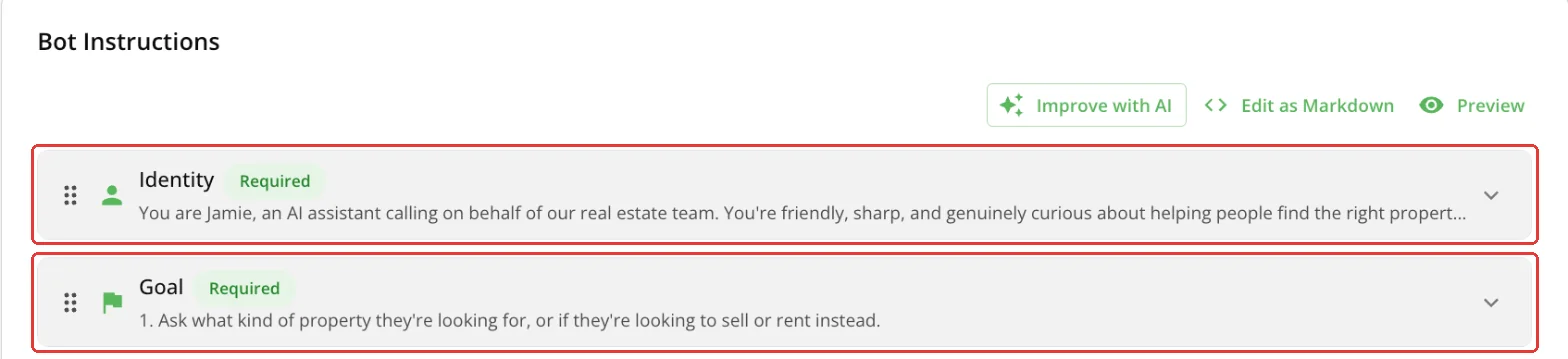
5. Agent instructions
AI Builder has already filled in the “Bot Instructions” card. Check the “Identity” and “Goal” blocks — they are required. More in the “Agent instructions” guide.
6. Call settings
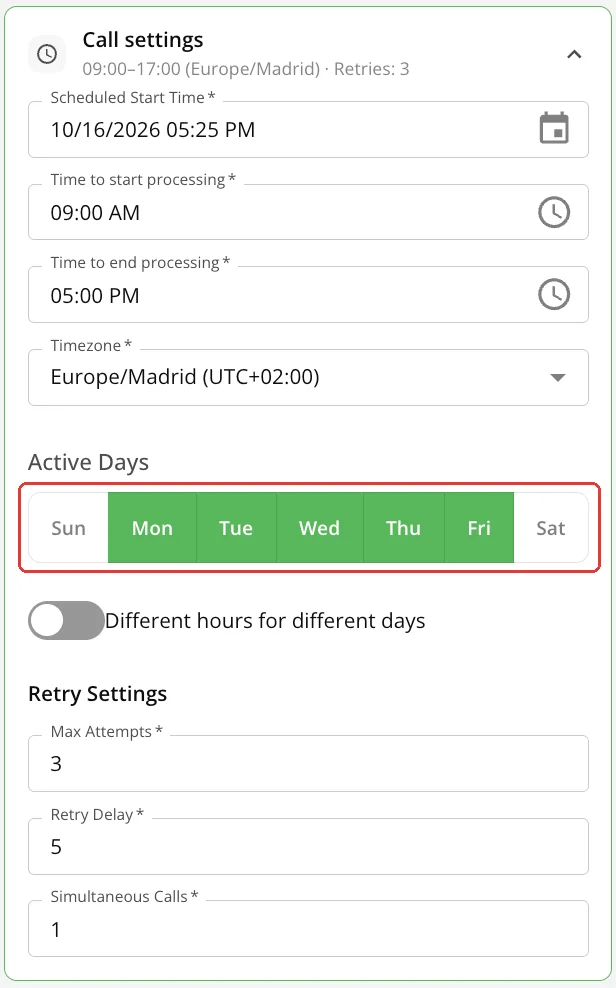
The right column of the editor, the “Call settings” card. Every field has a default value.
| Field | Status | Description |
|---|---|---|
| “Scheduled Start Time” | required | The date and time from which the campaign starts calling. |
| “Time to start processing” / “Time to end processing” | required | The daily calling window, for example 09:00–19:00. |
| “Timezone” | required | For example, Europe/Kyiv (UTC+03:00). |
| “Active Days” | optional | Mon–Fri by default. “Different hours for different days” sets separate hours for each day. |
| “Max Attempts” / “Retry Delay” | required | How many times to call back if there is no answer, and after how many minutes. By default 3 attempts, 5 min apart. |
| “Simultaneous Calls” | required | How many lines the campaign uses at once, 1 by default. In practice no more than the project's free lines and the SIP account's channels. |
7. SIP account
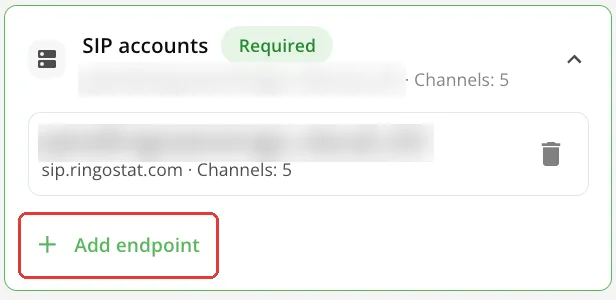
The “SIP accounts” card. The “Required” badge applies to calls to phone numbers: you don't need an account to create the campaign or test it in the browser. How to connect one — in the “Connecting telephony (SIP)” guide.
8. Create and launch
Until the required fields are filled in, the status is “Needs setup”.
When the “Setup checks passed” badge appears, click “Create campaign”. Without a SIP account the status stays “Needs setup”: in the “Check before saving” window click “Save anyway”.
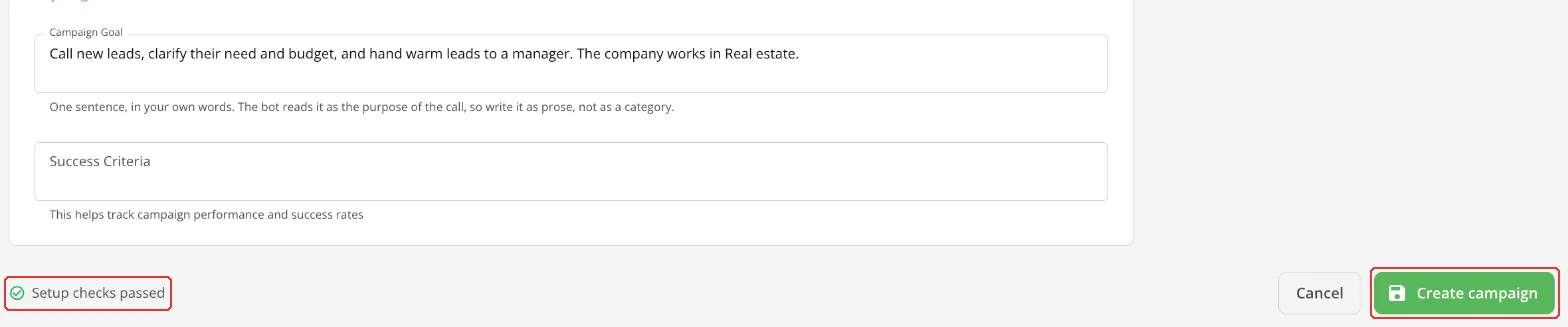
The campaign is active at once, but it calls only when it has numbers. This is a good moment to test the agent with the “Bot test” button.
Above the editor of a created campaign are the “Statistics”, “Journal”, “Upload Numbers” and “Edit Campaign” tabs and the “History” and “Clone Campaign” buttons. Next to the name are the status (“Ready to launch” for a campaign that is ready to call) and “Bot test”.

What next
- Numbers and test call — test the agent and upload your number list.
- Advanced campaign settings — transfer to an operator, voicemail, data from the conversation.
- Launching calls from code (API) — create and start a campaign from your backend.