
API and webhooks
- What you get:
- call results reach your CRM or another system automatically, and campaigns can be managed without the interface.
- Before you start:
- a URL that accepts POST requests with JSON; for an API key, project admin rights and a developer or an automation service.
1. Set up the data to send
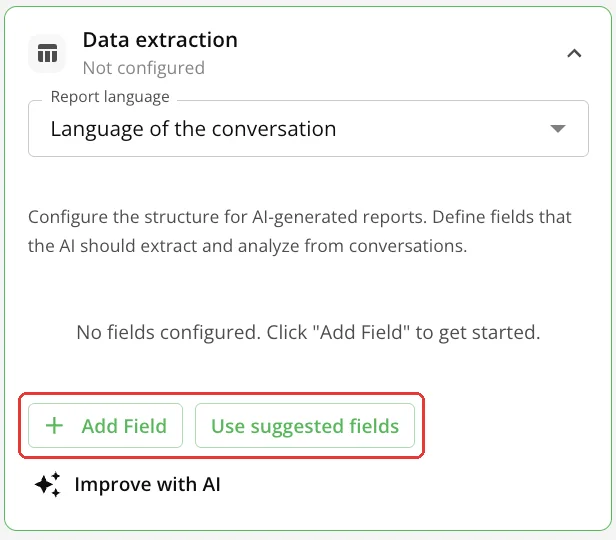
In the “Data extraction” card of the campaign editor set the fields the agent extracts from the conversation: budget, interest, callback date and so on. These are the fields that arrive in the webhook and the CRM. More in the “Advanced campaign settings” guide.
2. Connect a webhook
- 1Campaign editor → the “Webhook and reports” card.
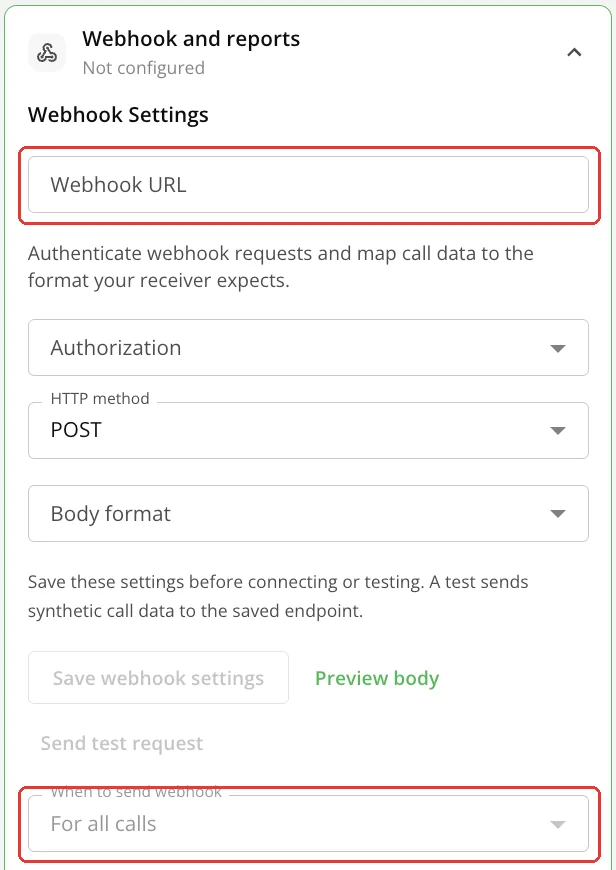
Webhook settings - 2Paste the address into the “Webhook URL” field.
- 3In the “When to send webhook” field choose which calls to send.
- 4Save the campaign.
After each finished call a JSON with the result and the extracted data arrives at this address; campaign_id and campaign_name in it help you tell campaigns apart. To check the address, click “Save webhook settings”, then “Send test request”: synthetic call data is sent to it.
3. Create an API key
- 1Left menu → “Settings” → the “Advanced settings” block. Only project admins see it.
- 2Click “+ Generate New Key” and give it a name if you like.

API keys - 3Copy the key and pass it to your developer. The key is shown only once.
The key goes in the X-API-Key header of requests to the platform's JSON-RPC API. A request example is on the same page, under the “Usage” heading.
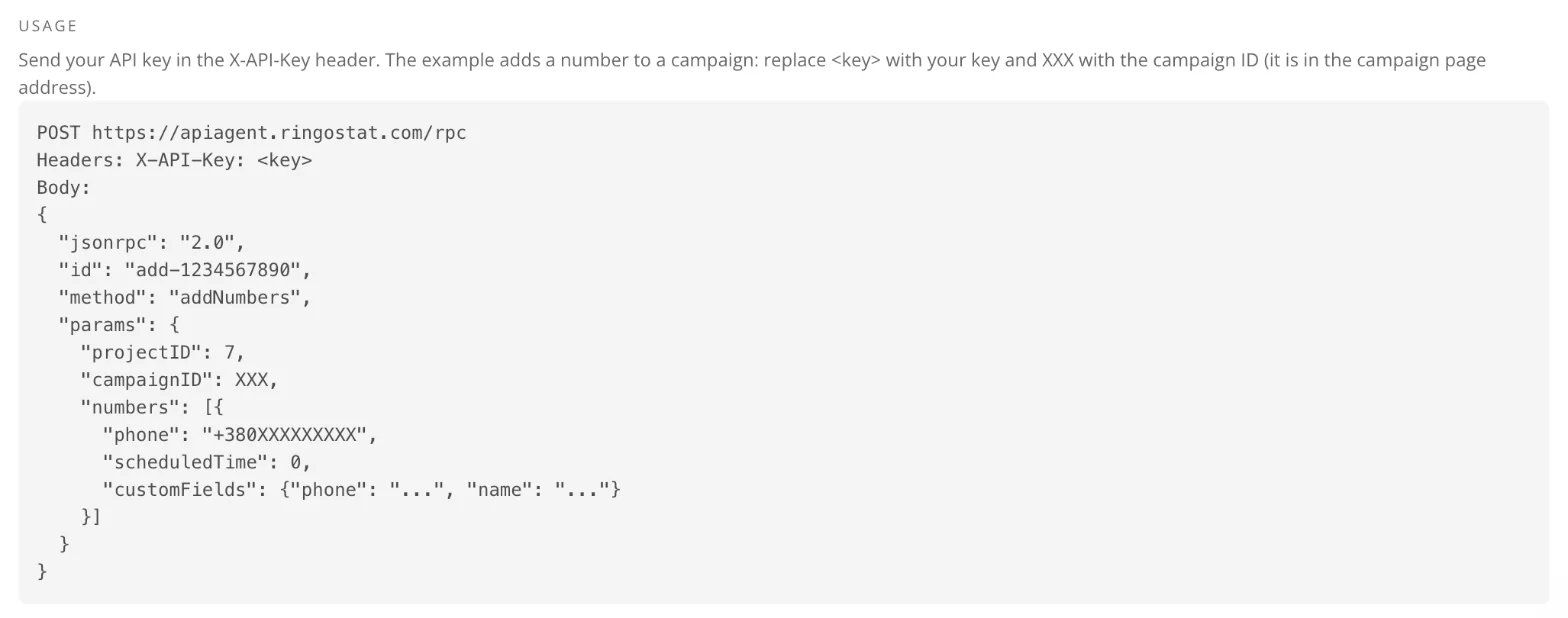
Project ID
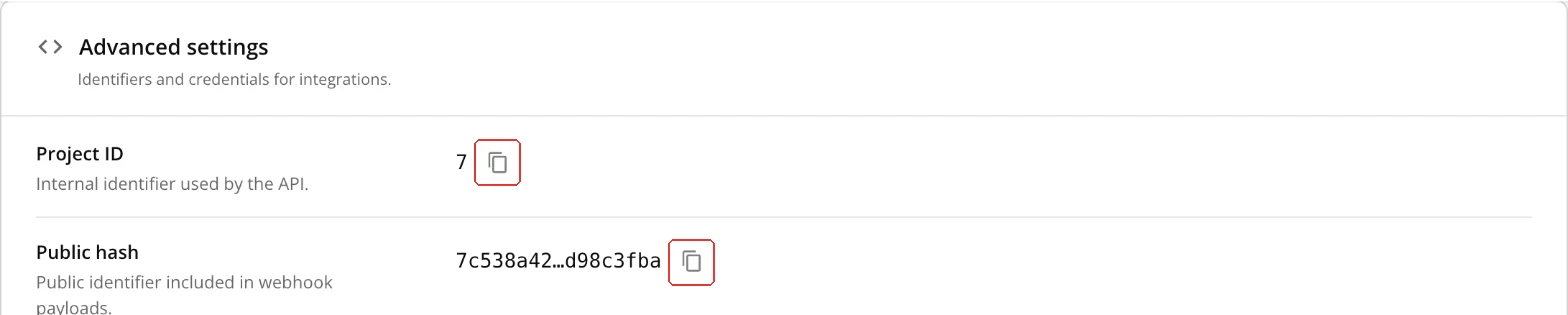
The “Project ID” is needed in API requests. It is in “Settings” → “Advanced settings”, with a copy button next to it.
What next
- Webhooks: call results — the report format, authorization and delivery.
- /rpc methods with examples — requests with an API key, for developers.
- Web calls — a conversation with the agent right on your site.
- Telegram reports — if you need a simpler way to get results.