
Knowledge base (RAG)
- What you get:
- the agent answers questions about prices, terms and policies from your documents.
- Before you start:
- materials as text, .txt, .pdf, .docx or .md files, or JSON articles. To connect a base to a campaign, the campaign must be saved.
The agent keeps the instructions in memory all the time. In the knowledge base it looks up only what it needs for the current reply. So large materials go here: price lists, FAQs, policies, manuals.
1. Create a base
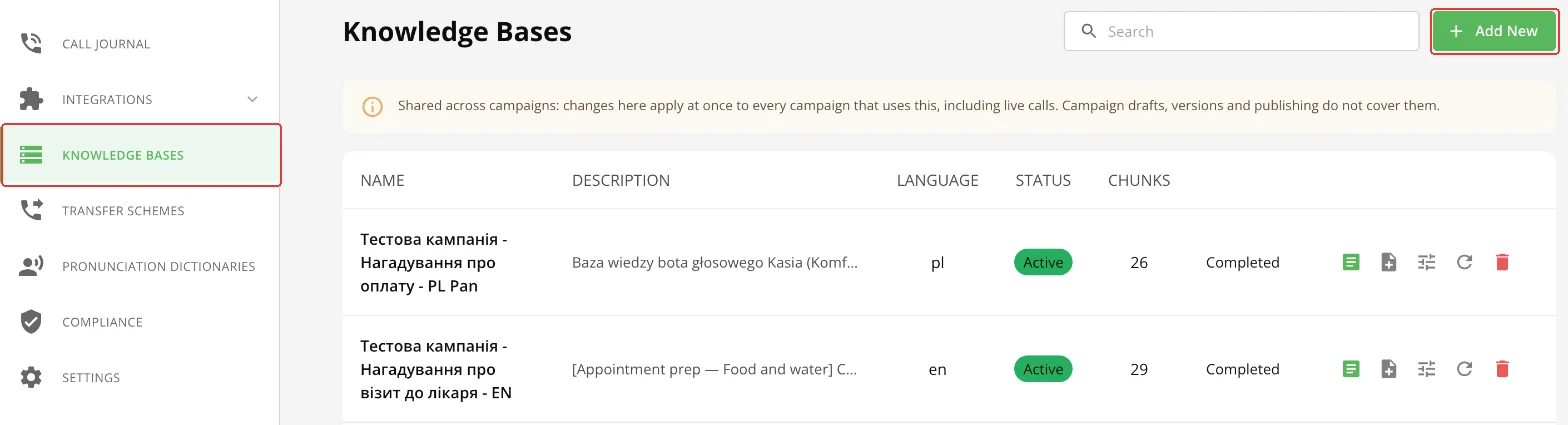
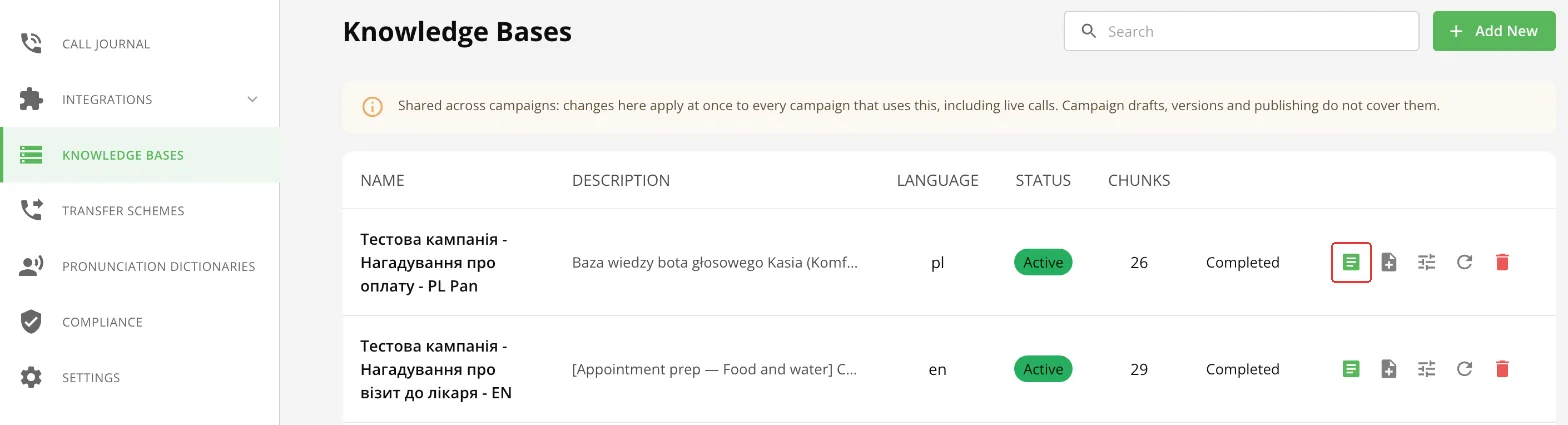
Left menu → “Knowledge Bases” → “+ Add New” in the top right corner.
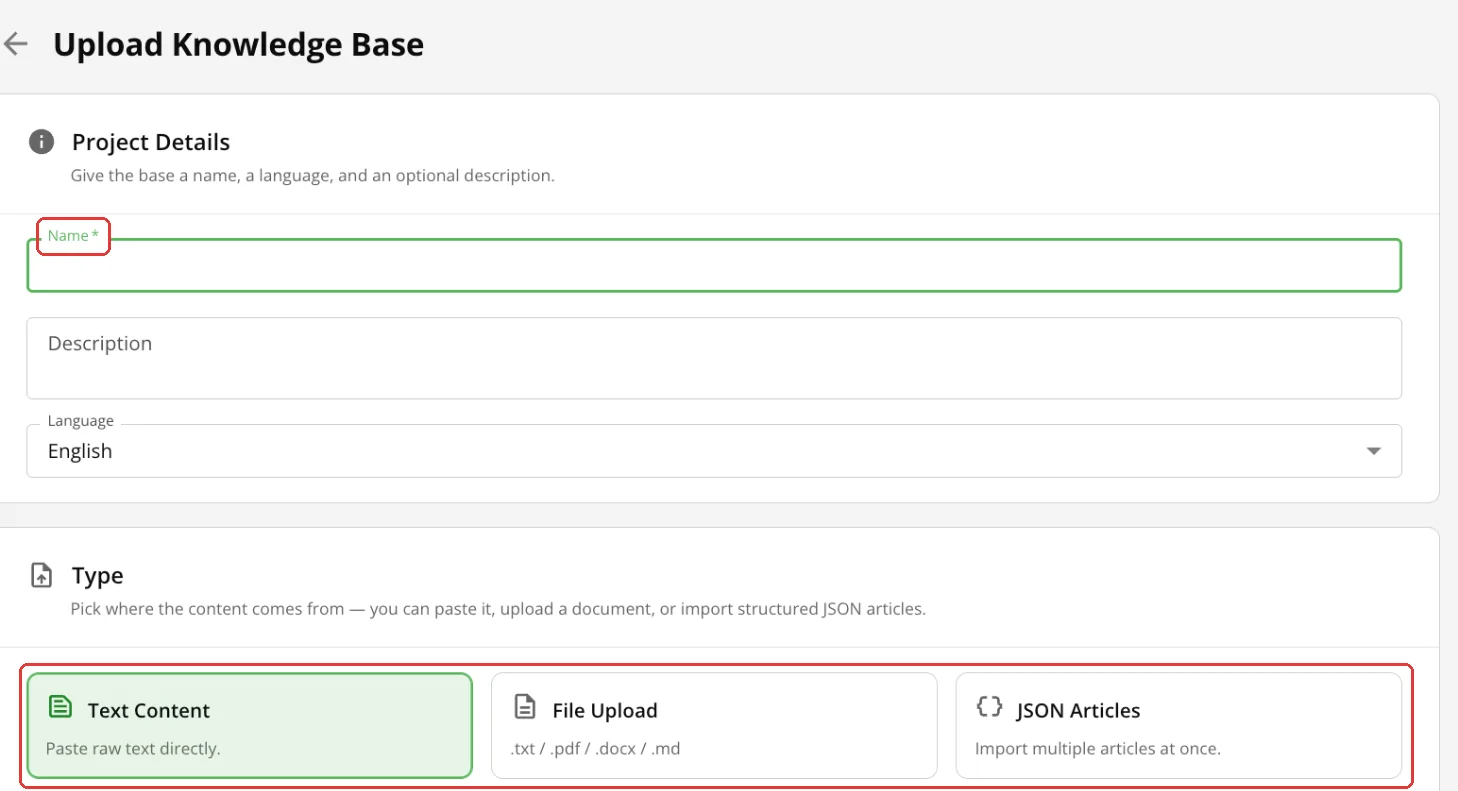
| Field | Status | Description |
|---|---|---|
| “Name” | required | The base's name in the list. |
| “Description” | optional | For you; the agent doesn't read it. |
| “Language” | recommended | The language of the materials; it affects search. English by default: for materials in another language, change it. |
| “Type” | required | “Text Content” (paste text), “File Upload” (.txt, .pdf, .docx, .md) or “JSON Articles” (a flat array, topics or FAQ — the format is detected automatically; for JSON the description, language and chunking don't apply). |
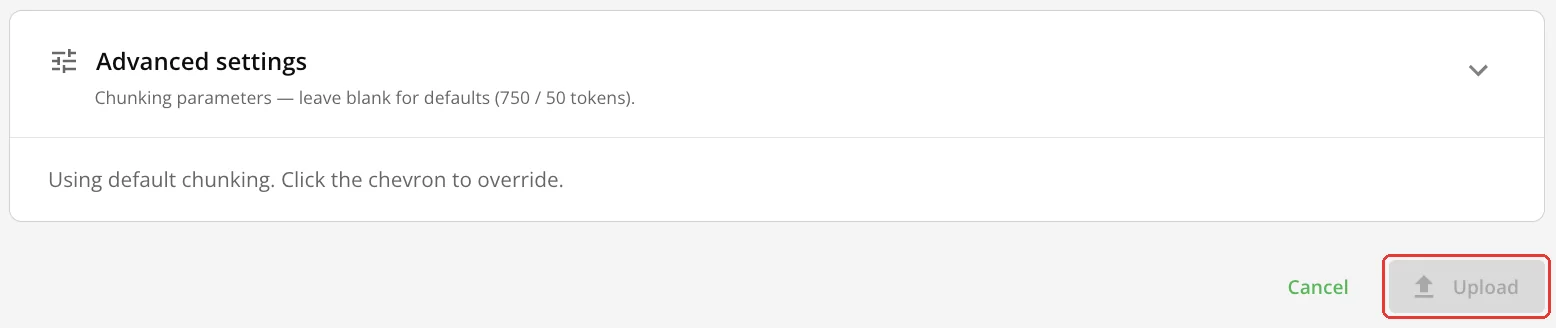
| “Advanced settings” | optional | Chunking: the chunk size (750 tokens by default) and overlap (50 tokens). Leave it empty for ordinary texts. |
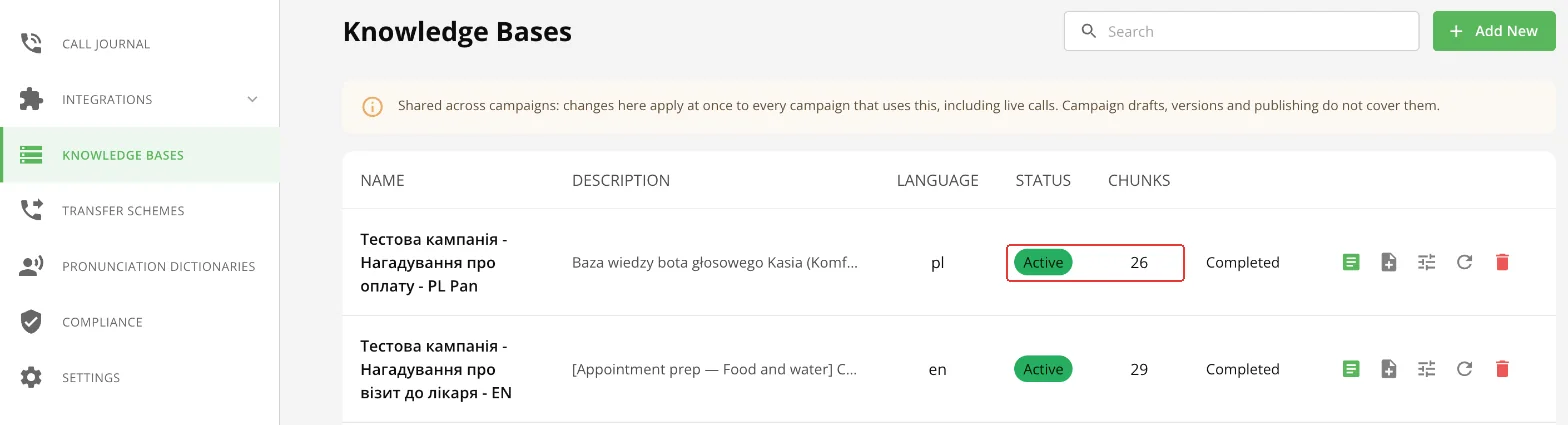
Click “Upload”. While the base is being processed, the list updates by itself. After processing the status changes to “Active” and the number of chunks appears.
2. Check the search
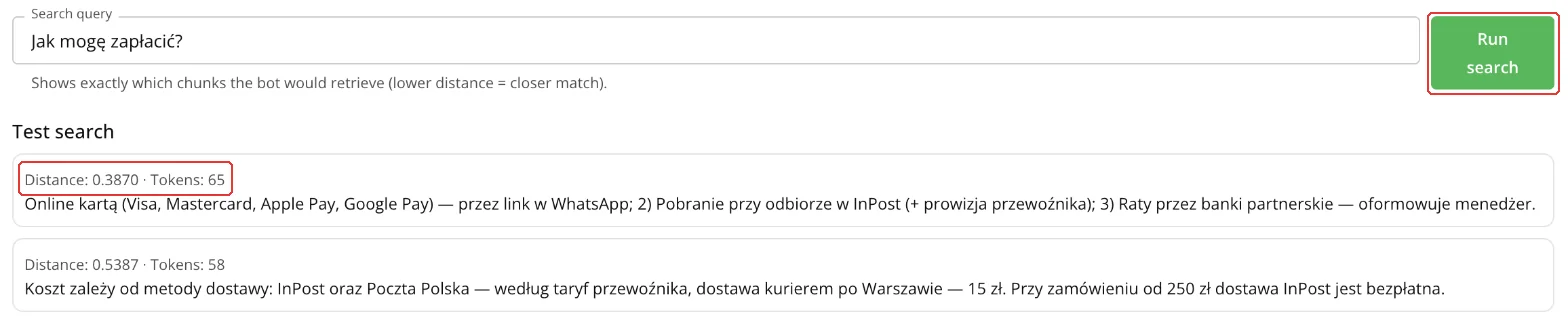
Next to the base click the green “View articles” icon. In the “Search query” field enter a customer's question and click “Run search”. You will see chunks close to the ones the agent gets: the smaller the distance, the closer the match.

3. Connect the base to a campaign
- 1Open the campaign editor → the “Knowledge base” card.
- 2In the “Knowledge Base Integration (RAG)” field choose “Enabled” and save the campaign.
- 3Select the bases this campaign needs. You can select several; a selected base is connected at once.
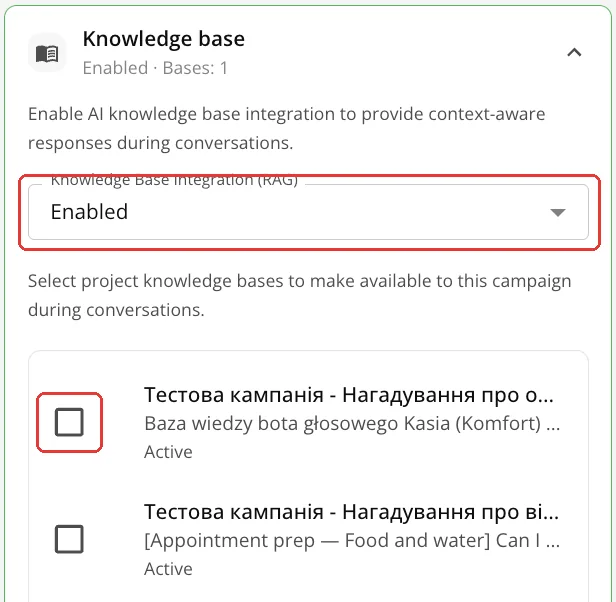
Knowledge base in a campaign
4. Keep the content up to date
| Action | How | Icon |
|---|---|---|
| Add an article | “Add content” next to the base → fill in the fields → “Upload”. The base's name, language and chunking stay the same. |  |
| Edit an article | “View articles” → the pencil icon next to the article → change the “Title” or “Body” → “Save”. |   |
| Delete an article | “Delete article” → confirm. |  |
| Change the base | The settings icon: name, description, chunking. New chunking applies after reprocessing. |  |
| Reprocess or delete the base | The matching icons next to the base. |  |
A new article goes through the “Pending” → “Processing” → “Completed” statuses, and the agent sees it only in the “Completed” status. After an edit the agent answers from the previous version until the new one is processed.
Tips before uploading
- One file = one article. Only the text is taken from a file; information from images doesn't get into the base.
- Split into small articles. The system breaks a large article into chunks; you can view and edit them with the (i) “Inspect chunks” button.
- One base, several campaigns. Changes to a base apply at once in every campaign it is connected to.
What next
- Numbers and test call — ask the agent about something that is in the base.